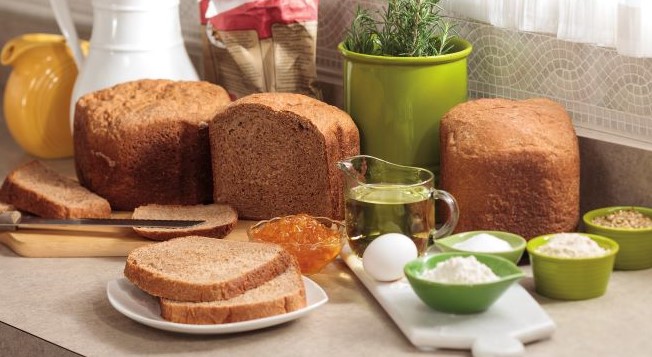
How does a bread maker work? Can I make gluten-free bread in a bread machine? Can I make dough in a bread maker and cook it somewhere else? These are just a few of the many questions our experts receive regularly. This post will tell you what a bread machine is, how it works, and how to use a bread machine to make bread or dough in just a few simple steps.
Typically, making bread involves several steps and a lot of time - at least an hour just for rising. A stand mixer is recommended, although you can, of course, make it by hand with a little more effort and patience. Alternatively, a bread maker does all this work for you. A motor turns a paddle to mix and knead the dough just the right amount. A heating element provides the gentle warmth needed for rising and, when it’s ready, the higher temperature needed for baking.
You add the ingredients, and the bread machine makes and bakes the bread in one handy appliance. Liquid ingredients are added first, then oils or fats, dry ingredients, and finally yeast (if your recipe calls for it). The machine will mix, knead, rise, and bake the dough to a beautifully soft bread with a crisp crust.
Once ingredients are added to the bread maker, what happens? First, the bread maker combines the ingredients and kneads the dough with a paddle that connects to the bottom of the bread pan. Once the first kneading is complete, a heating element provides just enough warmth for the dough to rise without baking it. Depending on the type of loaf you’re making, the dough rises for anywhere from 5 to 40 minutes. Then, a second kneading takes place, as does an additional rise for most cycles. Lastly, the bread maker bakes the bread to a light, medium, or dark crust depending on the selected setting.
Many different types of bread can be made with a bread maker. Bread makers have a variety of pre-programmed cycles to accommodate everything from a soft and sweet cinnamon bread to a crusty loaf of french bread. Differences in cycles include the amount of time needed for kneading, rising, and baking. Bread makers also have a dough setting that makes the dough but stops before baking it. This lets you bake it in a conventional oven, add it to a pizza maker, or cook it on the grill (try this grilled pizza recipe). Quick breads, cakes and even jam can be made with a bread maker.
Many people are maintaining a gluten-free diet but still want to enjoy a fresh slice of hot bread. Buying gluten-free bread can be expensive, and commercially-produced gluten-free breads may not suit your tastes. By experimenting at home, you can create a loaf that fits your tastes and dietary needs by using any of the gluten-free mixes on the market – or create your own recipe using gluten-free flours.
You know the feeling when you walk into a bakery and smell the aroma of fresh baked bread? Now imagine getting the same inviting scent in your own kitchen in three easy steps. No baking experience is necessary to use a bread maker, and most breads consist of just five main ingredients: flour, yeast, liquid, salt, and sweetener. Simply measure your ingredients and add them in the following order: liquids, dry ingredients, yeast. Select the settings for the type of bread you are making and press Start. That’s it. In as little as 1 hour, you can have a hot and delicious loaf of bread.
1. Fresh ingredients are key to making bread at home. Check the date code on your yeast package and make sure it is not out of date.
2. Measuring correctly is very important. Making bread is like a science experiment, so make sure everything goes together correctly. Because flour can often become packed in the bag, avoid dipping your measuring cups directly into the flour bag. Lighten it up by whisking the flour before you measure then spoon it into your measuring cup and level it off with a straight edge, such as the back of a knife. Want to check your measuring skills? Go ahead and weigh the flour. One cup of regular flour should weigh 125 grams and one cup of bread flour should weigh 127 grams.
1. Yeast needs the correct temperature to grow. The best temperature for your yeast is somewhere between 95°F and 115°F. With such a wide temperature range, you know that yeast is really quite accommodating. If the temperature is too low, the yeast may not grow and if it is too high, it will likely kill your yeast. An easy test is to put a couple drops of water on your wrist - it feels warm and comfortable to you, it will feel the same way to the yeast.
2. Kneading develops the gluten in bread and this is what provides the structure of your bread. When bread dough is kneaded enough, it will be smooth and elastic.
Homemade Pizza Dough in a Bread Machine
Stay up-to-date on the hottest food trends with our blog, discover a new favorite dish with recipes from our Test Kitchen, access your account, and so much more.
Interested in receiving emails, recipes and tips?